Wednesday, May 18, 2011
Frisco Tank Build #2
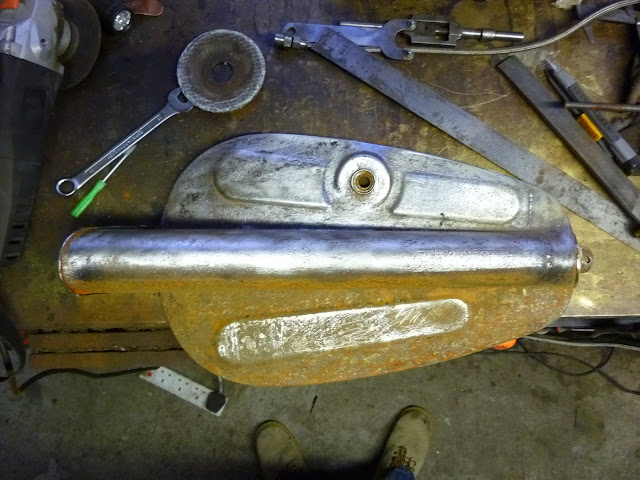
Pictures say so much more then words. Just Mocked up I have weld it up nice and petrol tight ;-) maybe easier said then done
Thursday, May 12, 2011
Frisco, Sportster Tank Build #1
Paper Template
Cut out of some old Tank?
Clean it Up
Try it for Fit
Spot Weld
My welding may not be getting any better but I am getting a lot of practice Grinding ;-)
Wednesday, May 11, 2011
Evo Sportster Front Brake Pads
 This was an absolute mother to get out, ended up having to take the brake off and use the impact driver with a lump hammer! make sure you have the brake supported on a piece of wood to save it from damage.
  Pads were down to the limit, nice touch is the backing plates, their little tabs make a sound to tell you the pads have reached their limit. Not shown as I could not stop to make more photos as it started to rain and I was out the front of the house.
Note old screw is back in till I get a new one ;) That Disc needs cleaning and painting me thinks. The one grip I have with me Evo Sportster is the lack of resistance to Irish Rain :-(
Friday, May 6, 2011
Sheldon, Disc, Bike
When are you going to clean the windows Brian?
Disc ready for drilling and then skimming. This will get a post of its own
The Story So Far
Disc ready for drilling and then skimming. This will get a post of its own
The Story So Far
Opening An Old Trashy Sportster Tank.
I just ground around the seam at the bottom of the tank. Then cut around the tunnel curves with a Dremel using small cutting discs
After a guick brush with a wire wheel in the drill
After finding so much filler and rust in here I am not sure how much real metal is left. Note, This not the original 1975 Sportster Tank, it just came with the bike!
After a guick brush with a wire wheel in the drill
After finding so much filler and rust in here I am not sure how much real metal is left. Note, This not the original 1975 Sportster Tank, it just came with the bike!
Sunday, May 1, 2011
Engine into Frame
Laid the engine on some cloth on wooden beams
Put the Frame over the engine, I have had to Source every mounting bolt as there were two rusty ones holding the engine in the frame when I got it..
Tighten Front Bolts First so we are not twisting the rear mount..Mine was welded when I got it so it cracked once in its history
Rear Bolts Tightened top one is in the vice getting 1/2 an inch cut off it !
Frame and Engine in perfect harmony at last :-)
The Build Begins In Ernest
Standard Front End Replaces the Wide Glides
It was no fun finding all the parts for that I can tell you
Subscribe to:
Comments (Atom)


